
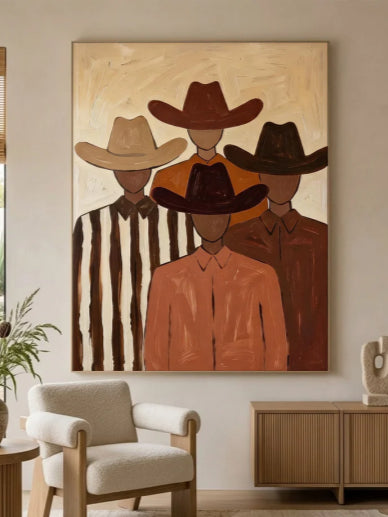
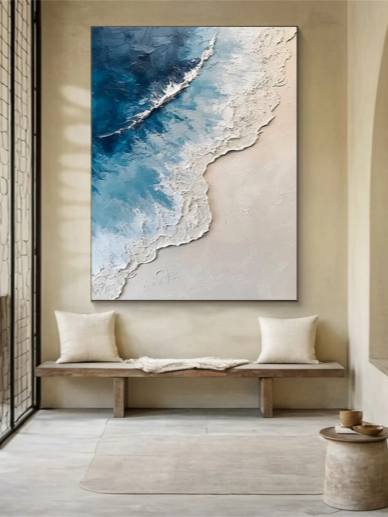


Hanging art on plaster walls can be trickier than hanging it on drywall. Plaster is hard but brittle, so hammering a nail directly into the wall or using the wrong anchor can cause cracks, chips, or loose plaster.
However, you don't have to avoid decorating your walls. With the right hardware and a little preparation, you can hang framed prints, paintings, and even larger pieces of wall art securely.
The key is to understand what's behind the plaster, choose a hanging method that matches your artwork's weight, and avoid putting unnecessary stress on the wall. Here are some practical tips to help you hang art on plaster walls while keeping damage to a minimum.
Understand Your Plaster Walls
Before hanging anything, take a moment to understand how your walls are constructed. Many traditional plaster walls consist of a layer of plaster applied over narrow wooden strips called laths. Some newer walls use different backing materials.
This construction affects which nails, screws, and anchors will work best.
Plaster walls vs. drywall
- Plaster walls: Harder and more brittle, making them more likely to crack or chip if you hammer or drill carelessly.
- Drywall: Softer and more uniform, usually making it easier to install standard drywall anchors.
If you live in an older home, your walls may have plaster over wood lath. In this case, avoid assuming that standard drywall hanging hardware will work.
When possible, check the wall construction before choosing your mounting method.

Choose the Right Hardware for Your Artwork
The best way to hang art on plaster walls depends on the artwork's weight, the wall structure, and whether you can attach the hardware to a stud.
Using the right hardware helps prevent damage and keeps your artwork securely in place.
For Lightweight Art
For small framed prints, lightweight paintings, and similar decor, picture hooks designed for plaster walls may be sufficient. Some traditional picture hooks use small angled nails that distribute the load differently from a nail driven straight into the wall.
Check the manufacturer's instructions and weight rating before installation.
For very lightweight pieces, adhesive picture-hanging strips rated for your wall's surface may also be an option. However, plaster walls can have uneven surfaces, loose paint, or aging finishes that prevent adhesives from sticking properly. Test the surface and follow the product instructions carefully.
For Medium-Weight Art
For medium-sized framed artwork, a properly installed screw secured into a wall stud is often a reliable option.
If you cannot reach a stud, choose an anchor specifically rated for plaster-and-lath construction or the actual material behind your plaster. Not all anchors designed for drywall are suitable for plaster walls.
Avoid choosing hardware based on appearance alone. Always check its load rating and account for the weight of the frame, glass, and artwork together.
For Heavy or Oversized Art
Large framed paintings, heavy mirrors, and oversized wall art require more secure support.
Whenever possible, fasten the mounting hardware into a suitable stud or other structural support. If the artwork is particularly heavy, use a mounting system designed for the combined weight and wall construction.
Do not rely on a single small nail or an adhesive strip to support heavy artwork. If you cannot identify a suitable mounting point, consider asking a professional to assess the wall.

Gather the Tools You Need
Before starting, prepare the following tools and supplies:
- Tape measure
- Pencil
- Level
- Stud finder suitable for plaster walls
- Drill and an appropriate drill bit, if needed
- Plaster-compatible picture hooks, screws, or anchors
- Screwdriver
- Painter's tape
- Protective eyewear
You may not need every item for a simple picture hook installation. However, having the right tools ready makes the process easier and reduces the risk of unnecessary wall damage.
How to Hang Art on Plaster Walls Step by Step
Once you've selected the artwork and hardware, follow these steps to hang your piece safely and neatly.
Step 1: Choose the Right Spot
Decide where you want to display your artwork before making any holes.
Consider the surrounding furniture, the available wall space, and the room's overall layout. For example, a painting above a sofa should feel visually connected to the furniture rather than floating too high above it.
As a general guideline, artwork often looks balanced when its center sits around 57–60 inches from the floor. This is a useful starting point, not a strict rule. Adjust the height to suit your room, furniture, and viewing position.
Step 2: Measure and Mark the Mounting Points
Measure the artwork and identify where its hanging hardware sits on the back.
If the frame uses a wire, pull the wire upward gently to the position it will reach when hanging. Measure the distance from the top of the frame to the wire's highest point.
Use this measurement to mark the correct hanging position on the wall. If the frame has two mounting brackets, measure their spacing and mark both points.
Step 3: Locate a Stud if Necessary
For heavier artwork, locating a stud can provide a more secure mounting point.
A stud finder may help, but thick plaster, wood lath, and metal components can affect its readings. Follow the tool's instructions and verify the location before drilling.
If the stud location is uncertain, avoid making repeated exploratory holes. A small inspection or professional assessment may be preferable, particularly in older homes.
Step 4: Drill Carefully or Install the Picture Hook
The installation method depends on your chosen hardware.
For a plaster-compatible picture hook, follow the manufacturer's instructions and position the nail at the specified angle.
For screws or anchors, use the recommended drill bit and drill slowly. Avoid excessive pressure, hammer-drill mode, or unnecessary force, as these can crack brittle plaster. If drilling is required, painter's tape over the marked spot may help reduce surface chipping, although it does not eliminate the risk.
Do not force a screw or anchor into a hole that is too small. Follow the hardware instructions, and stop if the plaster begins to crumble or crack.
Step 5: Hang the Artwork
Once the hook, screw, or mounting system is securely installed, carefully hang your artwork.
Check that the frame sits evenly against the wall and that its hanging hardware is fully engaged. Use a level to make any small adjustments.
For larger or heavier pieces, check that the mounting points and frame are stable before letting go.
You May Also Like:How High to Hang Wall Art: The "Golden Rule" for a Perfect Home
Step 6: Check the Final Position
Step back and look at the artwork from different parts of the room.
Make sure it is straight and properly positioned relative to nearby furniture, lighting, and other wall decor. If you're creating a gallery wall, check the spacing between frames for a consistent overall arrangement.
Taking a little extra time at this stage can make the entire display look more polished.

How to Hang a Gallery Wall on Plaster Walls
A gallery wall can add personality and visual interest to a living room, bedroom, or hallway. However, hanging several frames on plaster walls requires a little more planning.
Start by arranging your frames on the floor. Experiment with different combinations until you find a layout that feels balanced.
Next, measure the entire arrangement and transfer the mounting points to the wall. You can also cut paper templates the same size as your frames and tape them to the wall with painter's tape to preview the layout.
Keep these tips in mind:
- Plan before drilling: Confirm the position of every frame before making holes.
- Keep spacing consistent: Around 2–3 inches between frames is a useful starting point, although larger pieces may need more room.
- Consider the combined weight: Make sure every hook or mounting point can safely support its individual frame.
- Use a level: Check both individual frames and the overall arrangement.
For a large gallery wall, a picture rail or hanging system may be worth considering. It can make rearranging artwork easier and reduce the need to drill new holes each time you change the layout. Make sure the rail itself is securely attached to suitable structural support.
Extra Tips for Hanging Art Without Damaging Plaster
A few simple precautions can help protect plaster walls and make hanging artwork easier.
Check the wall condition
Look for cracks, bulges, or loose plaster before installing heavy artwork. Repair damaged areas or choose a more stable location.
Use a picture rail
If you plan to rearrange artwork frequently, a securely installed picture rail lets you move frames without drilling new holes for each piece.
Choose mounting points carefully
Larger or heavier artwork may need multiple mounting points, but each must be suitable for the wall construction and the artwork's weight.
Plan before making holes
Use paper templates to test your layout, and take a photo of an existing gallery wall before rearranging it. This helps prevent unnecessary drilling.

Common Mistakes to Avoid When Hanging Art on Plaster Walls
Even a straightforward hanging project can go wrong if the wall is not handled carefully. Avoid these common mistakes to protect both your artwork and your walls.
Hammering a Nail Directly Into the Wall
Plaster is brittle, and hammering a nail directly into it can cause cracking or loose pieces of plaster around the hole.
Use hardware designed for plaster walls and follow the correct installation method instead.
Using the Wrong Wall Anchors
Standard drywall anchors are not automatically suitable for plaster-and-lath walls. The anchor must be compatible with the wall's construction and the artwork's weight.
Check the product specifications before installation.
Drilling Too Quickly
High speed and excessive pressure can damage the plaster surface. Use the recommended drill bit and work slowly, allowing the tool to do the work.
If the wall begins to crack or crumble, stop and reassess the mounting location.
Ignoring the Artwork's Weight
A frame may weigh more than it appears, especially if it has glass, a solid wood frame, or a large backing board.
Weigh the complete piece when possible and choose hardware with an appropriate load rating. For heavy artwork, use structural support whenever possible.
Making Too Many Holes
Repeatedly moving a hook or screw can leave visible damage and weaken the surrounding plaster.
Measure carefully, use paper templates when helpful, and confirm your layout before drilling.
Final Thoughts
Hanging art on plaster walls doesn't have to be complicated. Choose the right hardware for your artwork's weight, drill carefully, and plan your layout before making holes. With a little preparation, you can display your favorite pieces while keeping your walls in good condition.
FAQs
Can you hang art on plaster walls without drilling?
Yes. Adhesive hanging strips can work for lightweight art if the wall surface is smooth and compatible with the product. Always check the weight limit.
What is the safest way to hang heavy art on plaster walls?
Secure the hardware into a wall stud or suitable structural support. For heavy or valuable artwork, consider professional installation.
Should I drill a pilot hole in plaster walls?
Yes, for many screw installations. A properly sized pilot hole helps reduce pressure on brittle plaster and lowers the risk of cracking.
How can I find studs behind plaster walls?
Use a stud finder designed for plaster walls or a strong magnet to locate lath nails. Verify the location before drilling.





Leave a comment
This site is protected by hCaptcha and the hCaptcha Privacy Policy and Terms of Service apply.